

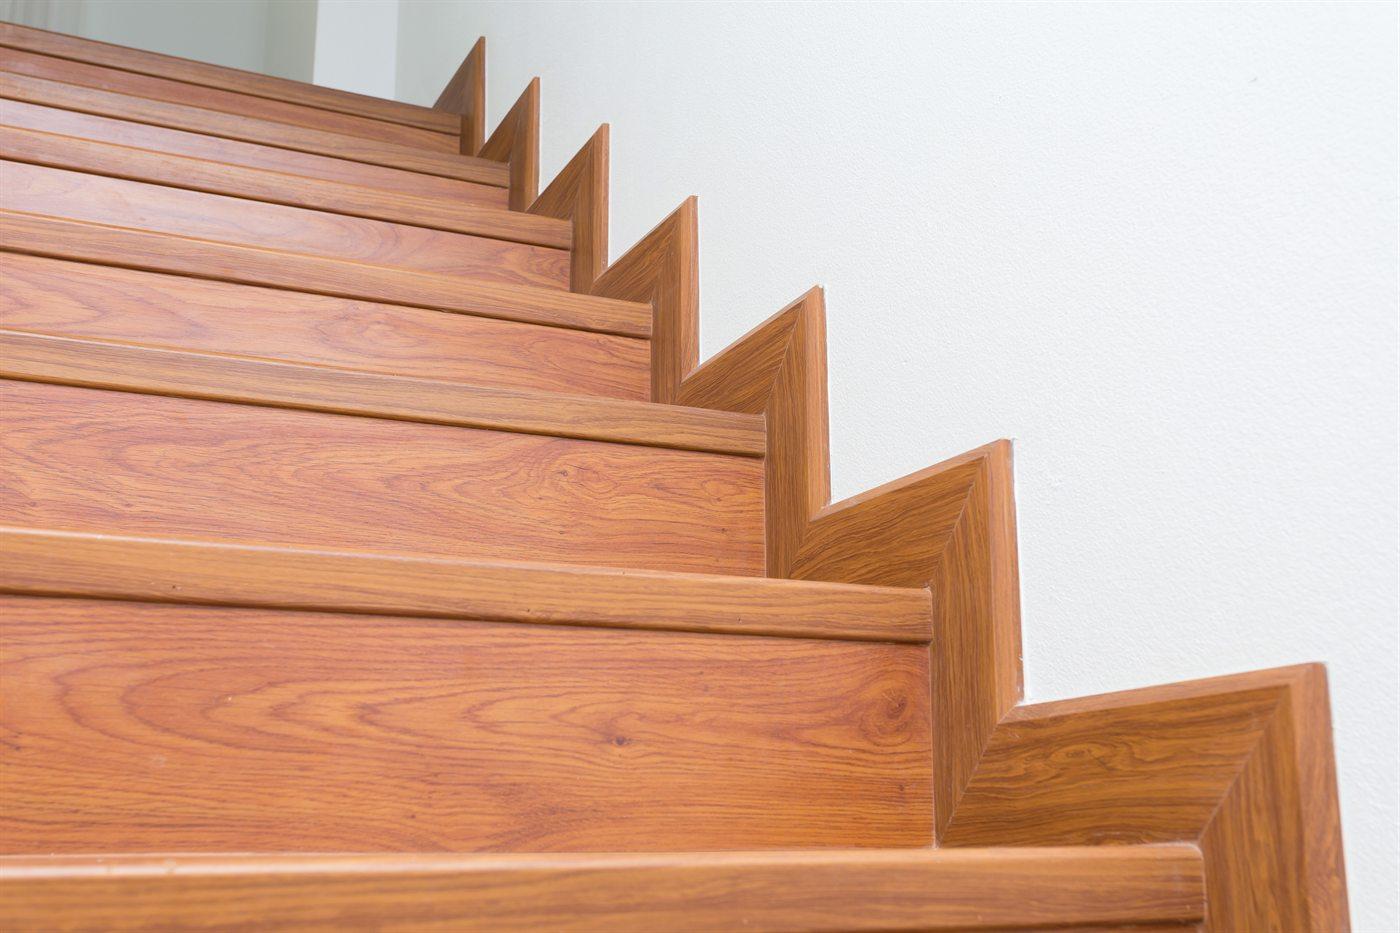
A retrofit stair tread is a 5/8″ solid-hardwood overlay with a built-up 1″ nose. It glues and nails over an existing tread so you can replace a carpeted, painted, or worn stair without opening the stringer. Done right, it turns a two-day full replacement into a one-day install. Done wrong, it breaks the IRC rise-uniformity rule at one end of the flight and creates a code violation.
The retrofit profile, in cross-section.
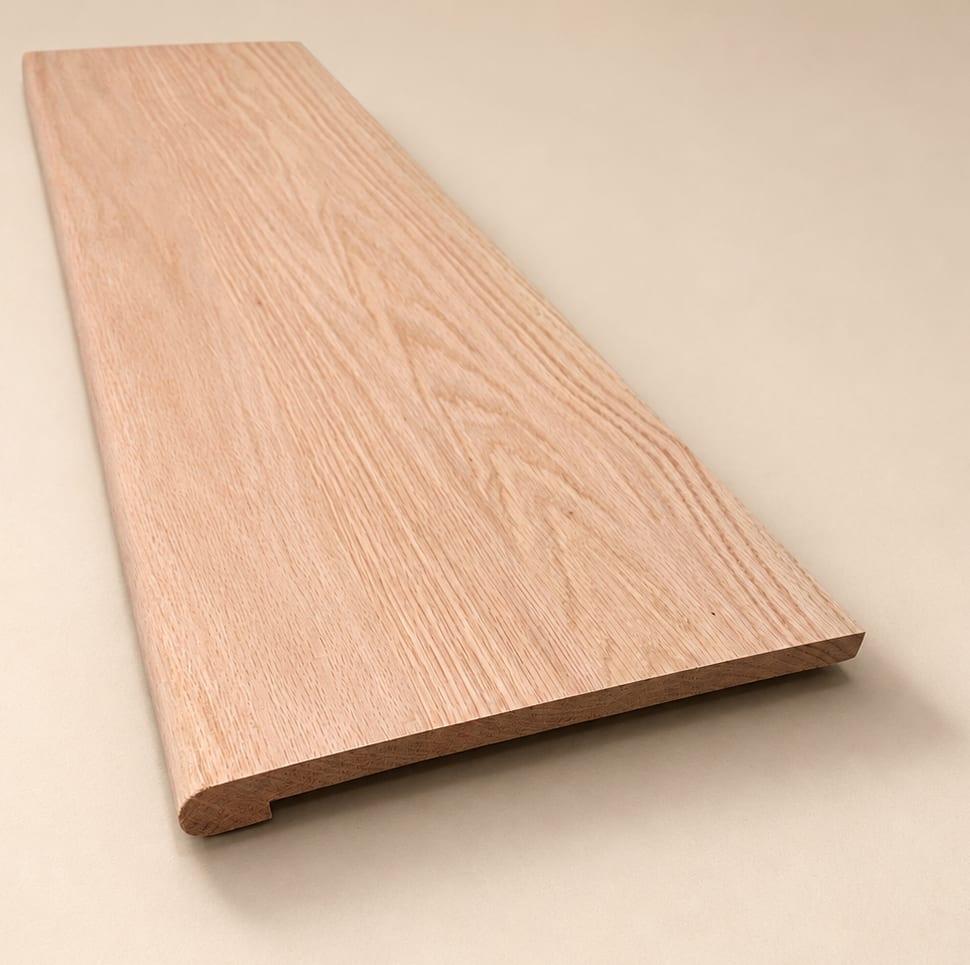
The UWP 8071 (bullnose) and 8073 (square / eased edge) retrofit treads are 5/8″-thick solid-hardwood overlays with a built-up nose laminated to the front edge. The nose brings the leading edge back to a full 1″, so the finished step looks identical to a new-build tread. From the side you see the overlay layer; from the front and the top, the stair reads as a clean hardwood tread.
- 5/8″ solid hardwood body — edge-glued, never veneered.
- Built-up 1″ bullnose (8071) or square / eased edge (8073) laminated to the front.
- 11-1/2″ deep. Catalog sizes 42″ and 48″ in Red Oak and White Oak, square ends.
- Other lengths, returned ends for open-side stairs, and other species are a custom run through the configurator.
- The 8073 has a matching retro-fit platform landing (48″ × 48″) for the landing at the top of the flight.
Walk the stair and check five things.
1. Is the existing tread structurally sound?
Step on every tread — front edge, middle, and back near the riser. Listen for squeaks; feel for flex. A retrofit overlay does not stiffen a soft tread. It transmits squeaks straight through. If a tread squeaks or flexes, fix the substrate first (screws into the stringer, glue into the riser/tread joint) or pull that tread and do a full 8070 replacement.
2. Can the existing nosing be cut flush?
The install manual's prep is to cut the existing nosing overhang flush with the riser face so the retrofit's built-up nose takes its place (Figure 1). That needs a track saw or a sharp handsaw and a steady line — and it needs the tread behind the cut to be sound wood, not a split or a crumbling particleboard edge. If the front of the tread is rotten or delaminated, replace that tread with an 8070.
3. What happens at the top and bottom of the flight?
Every tread you overlay rises 5/8″. The treads between them stay uniform — but the first rise up from the lower floor grows by 5/8″, and the last rise onto the upper landing shrinks by 5/8″ unless the landing rises too. Both ends have to be reconciled: new finish flooring on the lower floor, a retro-fit landing or matching overlay on the upper landing. If the upper landing is finished tile or LVT tied into door jambs and shoe, the math gets hard (Figure 2).
4. Is the carpet stripped clean to wood?
Strip carpet, pad, and tack strip. Pull or punch every staple. Scrape adhesive residue. The retrofit bonds to wood — not to felt, not to pad, not to dried mastic. Plan an extra half-day for prep on a carpet-conversion job.
5. Is the stringer width consistent?
Catalog retrofit lengths are 42″ and 48″. Measure every tread before ordering — older homes wander 1/2″–1″ between top and bottom. Order one length up and scribe to fit. Avoid scribing the front edge (it shows); scribe the back where it meets the riser.
Why both ends of the flight matter, not just the middle.
The International Residential Code (R311.7.5.1) allows a maximum variation of 3/8″ between the largest and smallest riser in a flight. The intent is safe foot placement — when steps feel different, people trip. A 5/8″ overlay on selective treads is a 5/8″ variation, which exceeds the code on its own.
The fix is uniform treatment across the whole run, ends included. Overlay every tread. Give the upper landing the same 5/8″ — an 8073 retro-fit landing, or a matching overlay on the landing floor. And account for the lower floor: on a carpet-to-hardwood conversion the new 3/4″ floor usually lands within 1/8″ of the overlay, which is why those jobs work out; on a floor that is not changing, the first rise is the number to check before you commit.
A clean retrofit install, step by step.
- Strip and prep — carpet, pad, tack strip, staples, residue. Sand or scuff the existing tread surface so adhesive bonds.
- Cut the existing nosing flush with the riser face on every step. Check each riser is plumb; shim or plane where it is not.
- Dry-fit every tread before glue. Scribe the back edge if the stringer width varies; cut to length with the saw blade on the underside to keep the visible top edge crisp.
- Pre-finish if applicable. Unfinished oak takes stain better off the stair than on. Pre-stain and pre-seal each tread on a horse before install — it saves a full day of finish work.
- Run polyurethane construction adhesive across the existing tread surface. Spread or comb it so the adhesive grips the whole underside, not just the front 6″.
- Set the tread, push it tight to the back riser, and nail through the front edge into the riser below with 16-gauge finish nails. Two nails per riser, set and fill.
- Repeat for every tread, then the landing. The landing overlay is the step that keeps the top rise in code.
- Caulk seams between tread and riser if your trim package calls for it; otherwise leave the joint to read clean.
The full step-by-step, with the adhesive and fastening schedule, is in the Stair Tread & Riser Installation Guide — as a page and as a PDF, linked below.
Curved stairs, irregular treads, and unusual conditions.
Catalog 42″ and 48″ retrofit lengths cover the majority of straight residential stairs. For curved stairs, pie-shaped winders, or treads outside that range, UWP runs an on-site precision templating service. We bring template stock to the job, build a template for every tread, and mill the treads to fit. Houston-area pricing is $125–$175 per tread for the templating; tread material is quoted separately.
Quick answers.
- How long does a typical retrofit stair install take?
- A 13-step straight residential stair runs about one work day for an experienced trim carpenter — roughly half the time of a full 8070 replacement. Carpet-strip prep adds half a day. Glue cure means the stair is restricted-use for 24 hours, but walkable in soft shoes after the last tread is set.
- Does the overlay change my tread depth or nosing projection?
- Not if the existing nosing is cut flush with the riser first. The riser faces do not move, so the nosing-to-nosing tread depth stays what it was; the built-up nose projects 1-1/4″ past the riser, inside the IRC range of 3/4″–1-1/4″. Leaving the old nosing in place and hanging the new nose in front of it pushes the projection past 1-1/4″ — which is why the manual says to cut it.
- Can I install retrofit treads over MDF risers or particleboard treads?
- Yes, with caveats. MDF and particleboard hold adhesive fine if they are dry and dust-free, and finish nails set well. The concern is structural — if the underlying tread flexes, the retrofit transmits that flex. Test for squeaks first.
- Will my balusters still fit after I add 5/8″ to every tread?
- Likely yes, with adjustment. Existing balusters get 5/8″ shorter (the tread top moves up toward the handrail). Wood balusters: pull them, trim 5/8″ off the bottom dowel or the square section, reset. Iron balusters: the shoes re-set on the new tread surface and the cut length shortens by the same 5/8″.
- Do I need to refinish the risers if I'm only overlaying the treads?
- Risers are usually painted (semi-gloss white is the default). Touch-up paint on the riser face after the new tread sets is normal — and the cut-flush nosing leaves a fresh riser top edge to paint. If risers are stained hardwood, plan for a thin scribe-piece at the joint where the new tread meets the old riser — color match is the harder problem.
- Can UWP template my curved staircase?
- Yes. UWP runs on-site precision templating across the Houston metro for curved stairs, winders, and irregular treads. We template the field condition, mill the treads, and deliver to the job. Templating service is $125–$175 per tread; tread material is quoted separately.
Related products and guides.
8071 Retro-Fit Stair Tread
5/8″ overlay with built-up bullnose. Red Oak and White Oak, 42″ and 48″.
View →Product8073 Square-Edge Retro-Fit Tread
Same retro-fit body with a clean square / eased edge — and a matching landing.
View →Install GuideStair Tread & Riser Installation Guide
The full manual as a page, with the PDF download — adhesive and fastening schedule included.
View →Decision Guide8070 vs 8071: Which Tread Fits?
The full comparison guide — full replacement vs retrofit.
View →On-site ServicePrecision Stair Templating
On-site templating for curved and irregular stairs.
View →CodeResidential stair code, cited
R311.7.5.1 and the rest of the IRC stair rows, with the part that meets each.
View →Questions next to this one
Can you retrofit thick stair treads over existing stairs?
Thick stair treads (1¾″ to 3½″) aren’t retrofit material — adding that much thickness changes the rise of the top step, puts the stair out of code, and creates a visible step where the new tread meets the upstairs floor. For the thick-tread look on existing stairs, the honest answer is a full tear-down to the stringers and a rebuild from the framing up.
Read the answer →8070 vs. 8071 — which stair tread fits my existing staircase?
The 8070 is a full 1″ tread for new builds or full demos. The 8071 is a 5/8″ retro-fit overlay built to drop over carpeted stairs without demolition. The key reason: when you pull the carpet, the wood skirt board next to the staircase is roughly 11/16″ thick. The 8071 lands flush against it. The 8070 sits about 1/4″ proud and looks unfinished.
Read the answer →How do I install hardwood stair treads?
A confident DIYer can install a hardwood stair tread retrofit in a weekend. The sequence: pull carpet and staples, prep the substrate flat and quiet, acclimate the treads for 5 to 7 days, dry-fit each tread, glue with a urethane construction adhesive, fasten with stainless trim screws (countersunk), plug, sand, and finish. Risers go in before treads on a full build; after, on a retrofit.
Read the answer →How do I match new stair treads to my existing hardwood floors?
Match new stair treads to existing floors in three steps: confirm the floor species (red oak and white oak look similar but stain very differently), order unfinished treads in the same species, and have the same finisher stain and topcoat both the floor and the treads with the same can. Pre-finished stair treads almost never match a site-finished floor exactly.
Read the answer →
Terms used in this guide
Spec retrofit treads with the configurator.
Catalog retrofit lengths are on the product page. Curved stairs, returned ends and non-standard lengths go through the configurator for a planning estimate and UWP fabrication review.